
Korea Travel Guide: How to Set a Motorcycle Route on Naver Map
1. Naver Map Main Screen
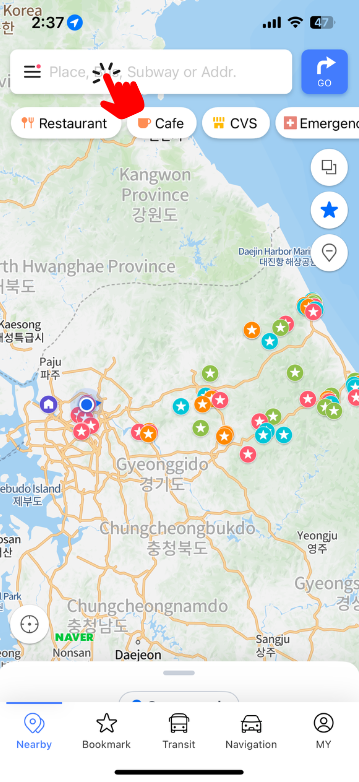
When you launch the Naver Map app, the main screen will appear.
- You can enter your desired destination or location in the search bar at the top.
- The map displays nearby facilities such as restaurants, cafes, and convenience stores.
2. Entering a Search Query
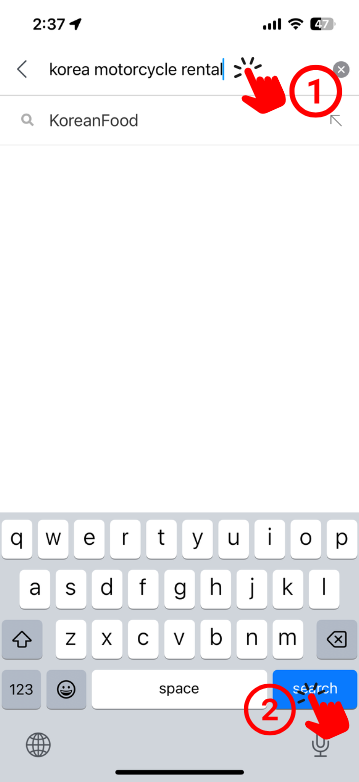
- Let’s search for the starting point first. Enter the shop name in the search bar.
Example: Korea Motorcycle Rental.
3. Search Results
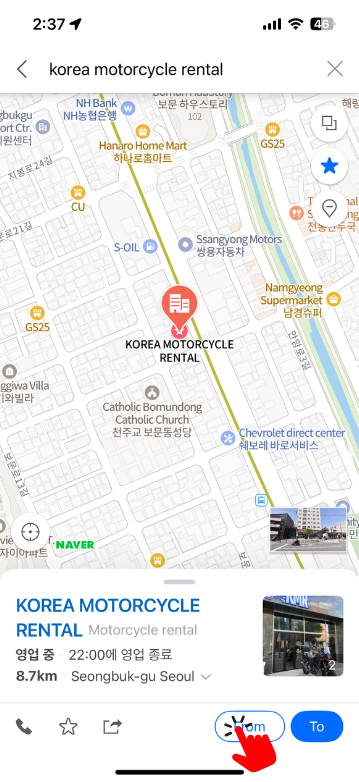
The searched motorcycle rental shop will be displayed on the map.
- Selecting a place allows you to view additional details such as the address, distance, and location.
4. Adding a Destination Search
Set the motorcycle rental shop as the starting point and search for Sokcho Central Market as the destination.
- Once you enter your desired location, you can check the route.
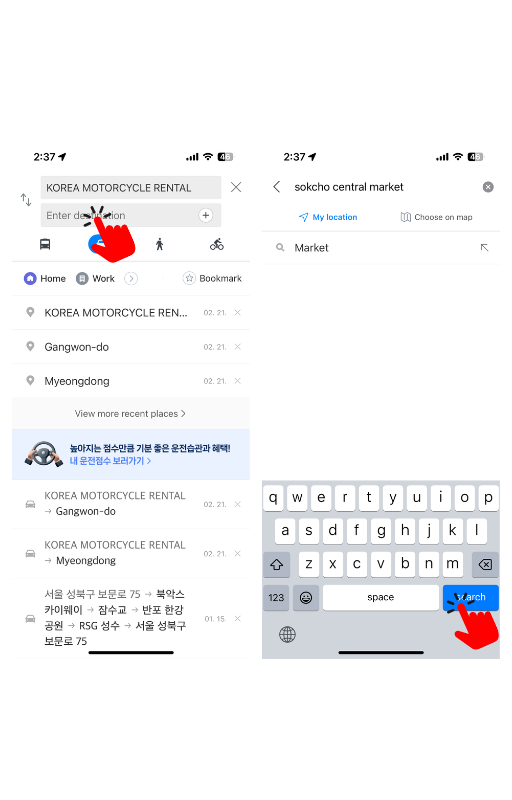
5. Destination Search Results
Sokcho Central Market or related nearby markets will appear in the search results.
- Select your preferred destination to check more details.

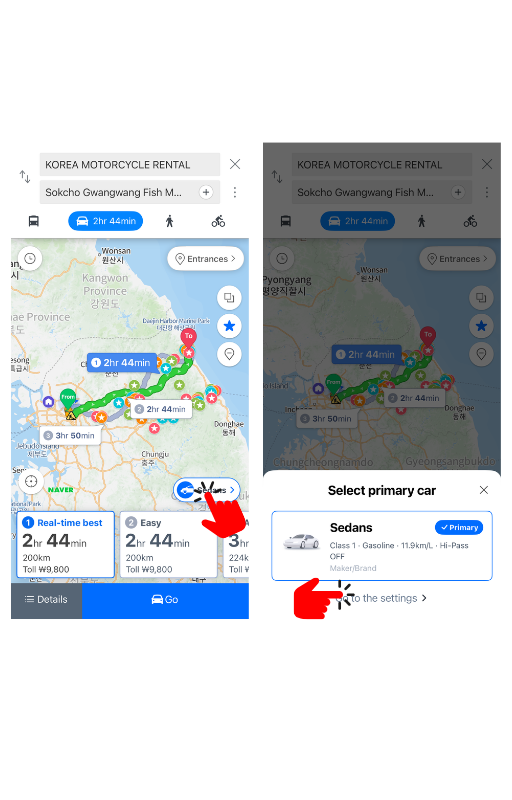
6. Route Search Results
The route from the motorcycle rental shop to the destination will be displayed based on a car route.
You can check the estimated travel time, distance, and toll fees.
Now, let’s switch to a motorcycle-specific route.
1️⃣ Click on the car icon at the bottom right.
2️⃣ The vehicle selection menu will open, allowing you to change your current vehicle type.
3️⃣ To set a motorcycle route, tap ‘Go to the settings’ and select
‘Two-wheelers’ from the vehicle type options.
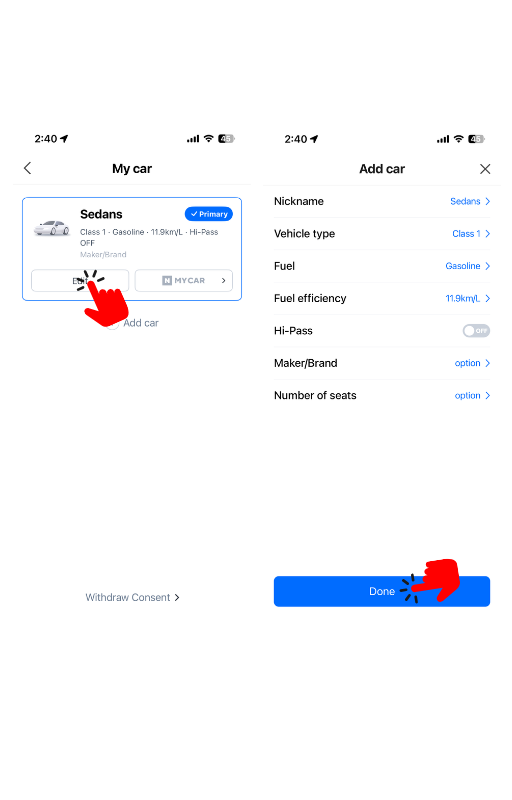
7-1. Modify Vehicle Settings
Now, let’s change the vehicle settings to configure a motorcycle-specific route.
1️⃣ Tap the Edit button to modify the registered vehicle information.
2️⃣ Change the “Nickname” field to “Motorcycle” or a similar name.
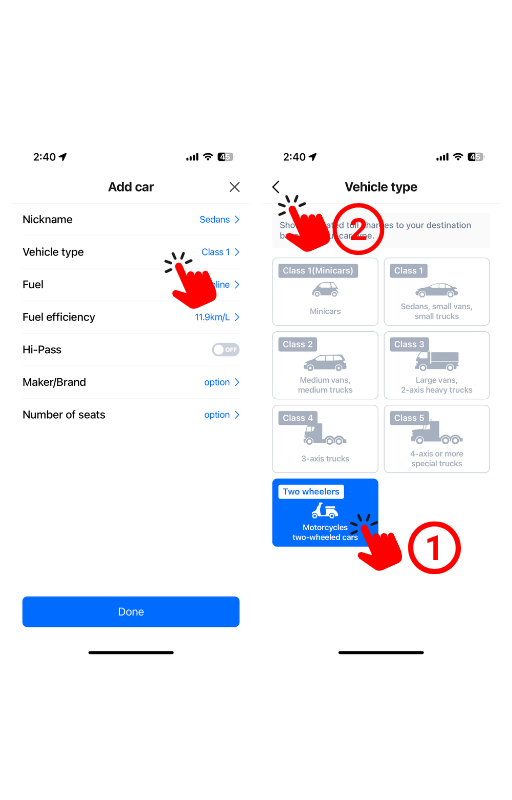
7-2. Modify Vehicle Settings
To enable motorcycle-specific routes, you need to change the Vehicle Type to Two Wheelers (Motorcycles).
1️⃣ Select Vehicle Type from the list.
2️⃣ Among the available vehicle types, choose “Two Wheelers (Motorcycles)”.
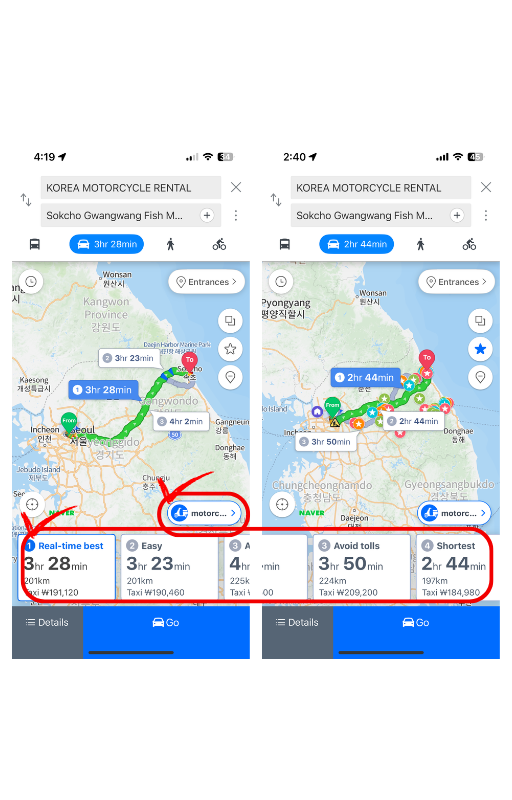
8. Confirming the Motorcycle Route
If you see the motorcycle icon in the bottom-right corner, your motorcycle route is now correctly set.
1️⃣ All four route options (1 to 4) at the bottom are motorcycle-friendly routes, so you can choose any of them.
2️⃣ Select your preferred route based on options such as Real-time best, Easy, Avoid tolls, and Shortest.
3️⃣ Once the route is set, tap “Go” to start navigation.
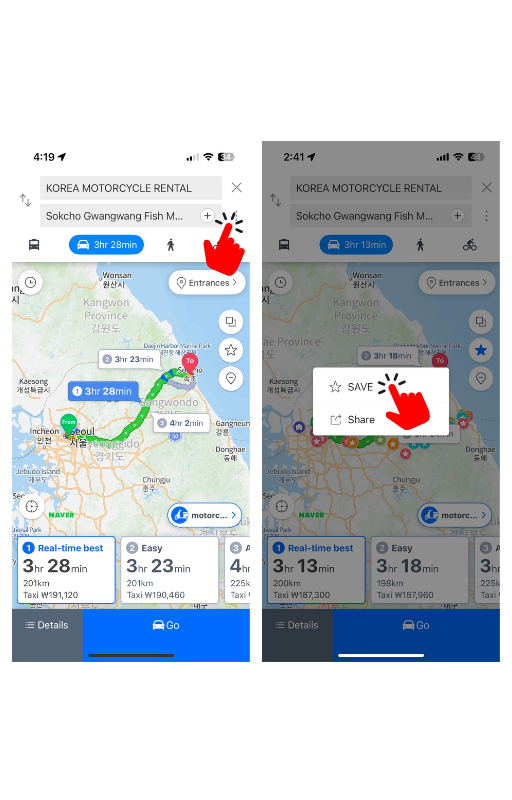
9. Save and Share the Route
If you want to save or share your custom route, tap the three-dot menu (⋮) in the top-right corner.
1️⃣ Tap ‘SAVE’ to store the route for later use. You can later find it in the ‘Bookmark’ section under ‘Routes.’
2️⃣ Tap ‘Share’ to send the route to a friend or another device.
3️⃣ Select the desired option and follow the on-screen instructions to complete the process.
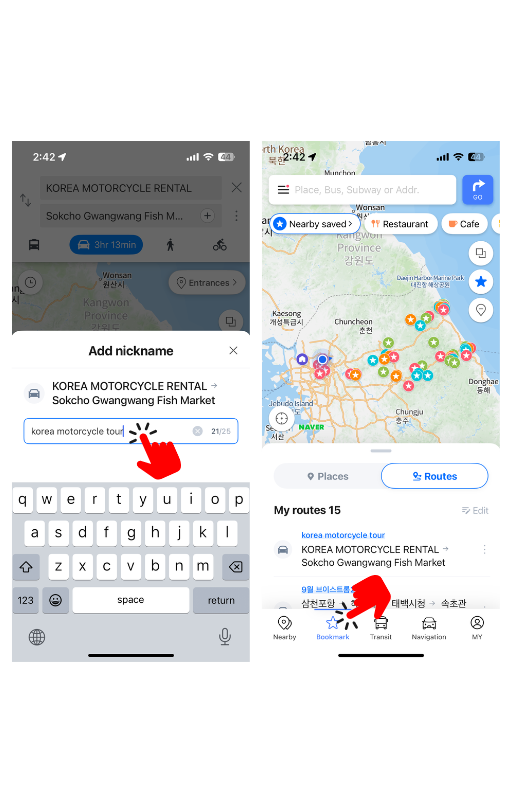
10. How to Save and View Routes
Click the Save button to set a name for your route and complete the saving process.
Then, tap the Bookmark (star icon) at the bottom to check your saved places (Places) or routes (Routes).
Now, you can conveniently save and access your custom motorcycle tour routes anytime.
By using Naver Map, you can enjoy a more convenient and safe motorcycle trip. Learn how to search and set routes to plan your own amazing journey. Wishing you a safe and enjoyable ride!